Procedure for Straightening by Heat Correction
Thermal techniques
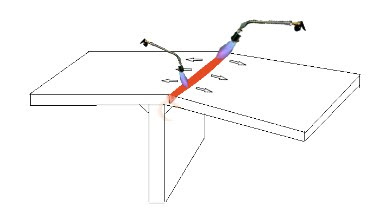
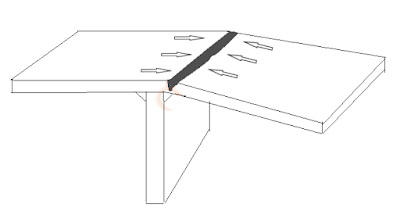
"The basic principle behind the thermal process is to create high local stress so that, on cooling, the job is pulled back into shape. Local heating is a simple and effective process of correcting distortion. This process requires a lot of experience as there is no standard rule of shrinkage so any new job if repair is required then first it should be tested to establish correct shrinkage"
Purpose-
After welding, most of the items get destroyed in their shape (warpage, twist, bend, etc) for correction, we need this procedure.
Procedure –
QA Engineer shall confirm the requirement for straightness. The area requiring straightening/heat correction shall be identified. The heat correction shall only be carried out with reducing flame on the area marked & cleared for heat correction. The heat shall be applied gradually. The heat correction should preferably be limited to below the lower critical temperature of 650°C. This should be verified with a temperature stick of 650°C for the maximum limit. Normal air cooling shall be permitted after the heat correction is completed. Heat correction shall not be carried out at the same location twice without prior approval/ permission from QC.
Non-destructive testing -
PT
/ MT shall be carried out – after completion of heat correction/straightening.
Trials
/ Tests carried out -
Based on the mock-up simulation trials
carried out for the above procedure, the test results are found satisfactory for
Hardness (See Annexure 1)
Annexure 1
Simulated trials for heat corrections
on – With heating
Base material– IS 2062 410 Gr. C/ 350
Gr. C
Heating by Flame at 650°C for max 120
minutes.
Mock-up sample No. 1
Description
|
Hardness, BHN
|
Remarks
|
Base material
|
||
Base Metal Heat corrected zone
|
X1 = width of V after heating
X2 = width of V after cooling to room temperature
you will find that X2 is always smaller than X, and this reduction in size creates local stress which pulls the object back in shape.
X2 = width of V after cooling to room temperature
you will find that X2 is always smaller than X, and this reduction in size creates local stress which pulls the object back in shape.


No comments:
Post a Comment
Please do not enter any spam link in the comment box